Map Monsters
Common Monsters
● These are found in all areas in the game and are hunted for materials or in order to complete quests.
● There are a few general tribes of common monsters, otherwise known as species. Those typically found are the following 6 tribes:
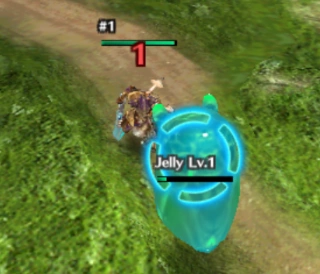
- Purun - Slime-like monsters
- Vacca - Bull-like monsters
- Geguri - Toad-like monsters
- Bat - Winged monsters
- Galena - Bird-like monsters
- Fungo - Mushroom-like monsters
● Depending on the area these monsters appear in, they come in different levels; item drops; element. For example, Green Puruns belonging to the Earth elemental type are weak to Fire elemental damage.
● Item drops from a common monster are determined by its tribe and element. Killing monsters from the same tribe would yield the same equal grade materials. The monsters additionally drop other materials depending on its own element. These materials are required for crafting and upgrading equipment.
● Common monsters can have an elite type that spawns less frequently and in lesser numbers. They usually have more health and offense but may provide rarer item drops. One popular example is the Large Golden Purun.
Sudden Behemoths
● While hunting in any map areas, there is a chance for players to encounter a Sudden Behemoth. The player will be notified when this happens. Every player on the map can participate in hunting down the Sudden Behemoth. Players are grouped into 1 random party if the current map area has more than 4 players.
● Behemoth Monsters may also be encountered just before entering another a newly unlocked map area, sometimes as part of a main quest objective.
● There are 2 different encounters, Common and Rare. Rare encounters are indicated by a golden text prompt instead. These encounters are usually tougher to defeat but they have a chance to give a rare item drop serving as the catalyst (proof) in crafting a set equipment piece.
● Sudden Massive Monsters are alike to fighting monsters gotten from Gacha, defeating them will provide both exclusive and common materials. Destroying their body parts would also yield additional materials.
● Massive monster encounters can also reward gems based on accomplishing up to 3 different conditions:
- Eliminate the monster without dying once
- Use an ability of a specific type
- Eliminate the monster within shorter time limit
Every fulfilled condition will reward 1 gem and completing all 3 will grant players an extra bonus 1 gem, up to 4 gems per Sudden Massive Monster. Players may not receive additional gems for defeating the same massive monster at the same map area.
Boss Monsters
Methods of Encounter
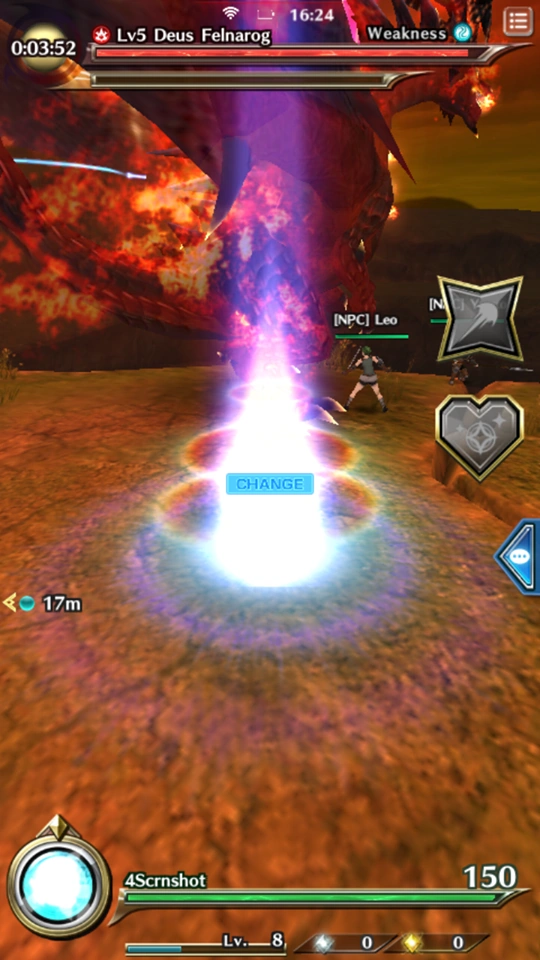
● There are 3 ways to encounter a boss monster in the game. They are graded according to rarity which also often defines how strong they are. B grade bosses are the most common and weakest while SS grade bosses are extremely rare and can be difficult to take down. The following are ways to encounter them:
- Sudden Massive Monster
While fighting common monsters in any map area, players on the map have a chance to encounter Rank B to Rank S boss monsters. Rank S encounters may have a chance to give a rare item drop that players can use to forge set equipment pieces.
 |
Depending on the current ongoing events, players are able to play through event quests that feature taking down boss monsters of various grades. Some events provide different difficulties to cater to both new and veteran players. Apart from recurring events, certain events are limited time exclusives for players to get rare equipment and materials. |
 |
Boss monsters that drop guaranteed materials to forge the latest equipment sets are gained via Monster Gacha. Players can fight them anytime with a party of friends or other players. Upon defeating one of these, an exclusive material called a Lithograph will be provided for players to forge a piece of the related equipment set. Defeating 5 of the same summoned boss will allow players to forge a complete set of equipment consisting of 4 armor pieces and 1 weapon. |
Tips and Tricks to defeat Boss Monsters
● Bosses are usually difficult to take down, especially if they are higher than party members’ level and are of a high ranking grade. The following tips below will help in defeating them effectively:
- Weaknesses
Bosses that belong to an element type would suffer more damage if players deal damage of the stronger element. Certain bosses may also be weaker to particular weapon types where its weak points favour damage done from them. Equipment and Magi Stones with weaker stats may have an upper hand if the players utilize them during correct scenarios.
- Attack Patterns
Every boss comes with its own quirks, they move and attack differently. Observing these patterns would have players identify best opportunities to attack the boss. The game helps players by indicating the affected area with red before the boss executes a strong attack. Veteran players will be able to avoid these attacks earlier and move to vantage points to continue attacking confidently.
- Weak Points
As part of the boss’s behaviour, it will reveal its weak points for a short duration from time to time. Dealing damage to the weak point location will dish out extra damage. Enough damage dealt with certain weak points may destroy a body part of the monster, granting players additional materials. Damage done to weak points can also add to a gauge that incapacitates the boss, see below.
- Incapacitation
Indicated by a smaller yellow gauge below the boss’s health gauge, players contribute to increasing this gauge by targeting damage on weak points. When this is full, the boss will be rendered incapacitated for a limited time. Attacks done to the boss will inflict much more damage. This is a great opportunity for players to safely execute offensive Magi Stone and Heat Type abilities.
- Special Weak Points
Unlike the default weak points, these usually require players to attack with a particular weapon type’s special ability (e.g. Lance’s thrust ability) or a Magi Stone ability of a particular type. A successful hit on the weak point will stagger the boss and prevent it from executing its next attack.
Combat System
Basic Information
Overview
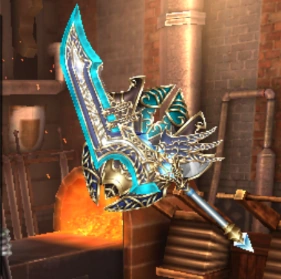
There are 5 different kinds of weapon in the game and 4 different armor pieces. They each have their own strengths and weaknesses to suit a variety of player preferences and different combat scenarios. Some weapons may come with elemental damage and some armor pieces, elemental resistance.
● Elemental Attributes
Equipment that comes with an element attribute would be 1 out of the 4 element types in the game. Each element is strong against one element and weak to another. The strength/weakness order are as follow: Water > Fire > Earth > Lightning > Water.
● Special Ability Types
Weapons are also differentiated by their special ability type: Normal or Heat. While they both share the same basic attacks and combos, they have separate ways of executing their ability, often most triggered when the player holds down a touch input on the screen.
 |
● Equipping and Switching Weapons
During combat, player can only attack with 1 weapon at a given time. Each player is able to have a loadout of up to 3 equipped weapons with the ability to switch between them during combat to cope with different scenarios. Switching weapons require a small delay, leaving the player vulnerable and stationary. This weapon loadout can be changed at the armory. |
Sword and Shield
 |
● Description
The player starts off with this weapon type. This is an all-rounder type that is highly suited for beginners but yet offers a high level of mastery with its ability to guard. This is also the only weapon type that offers defensive capabilities. |
 |
● Special Ability Normal - Guard and Counter (Timed Guard)
The normal type special ability of the sword and shield allows the player to guard by holding down on the screen for as long as they want. A player in guarding stance will take reduced damage but have reduced movement speed. Additionally, if a player performs a timed guard occurring when timely guarding just before receiving an enemy’s attack, the player will receive a guaranteed 90% damage reduction. Releasing the guard after any successful block will unleash a counter-slash attack, dealing increased damage with a single vertical slash. Guarding does not prevent the player from getting inflicted with status effects. |
● Special Ability Heat - Guard and Counter (Vengeance Attack)
The heat type special ability of the sword and shield behaves similarly to the normal type except it is has a second ability. The heat ability allows player to unleash a vengeance attack dealing massive damage. This can be done after charging up the heat meter with every successful attack blocked. When the meter is completely full, a powerful vengeance attack can be executed when the player holds down on the screen.
● Playing Style
The recommended playing style of the sword and shield is to keep in close contact with an enemy boss as much as possible. The player maintains survivability by using guards and counters as much as possible. Keeping close to enemy confidently allows more opportunities for players to strike the enemy’s weak points, making up for the damage loss in comparison to other weapon types. With increased survivability, players using the sword and shield are also often the party member that is able to help revive fallen players.
Two-handed Sword
 |
● Description
The heaviest hitter in the game. This weapon type features a tremendous attack power but slow attacking speed and hit succession. This weapon is crucial towards taking away chunks of health from tougher enemies, granting players a risk and reward chance of challenging enemy bosses at higher levels. |
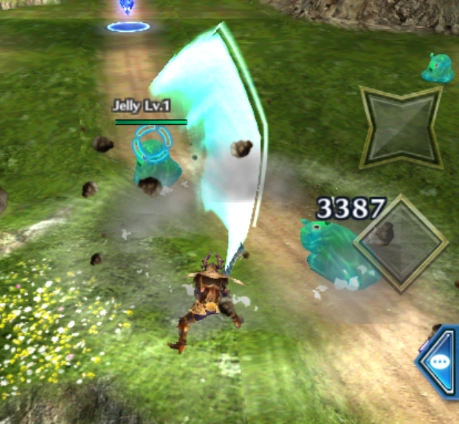 |
● Special Ability Normal - Charged Slash (Elemental Boost)
The most important feature and deal breaker for this weapon is the ability to charge and apply heavy to massive damage based on the charged time. Players simply hold their finger down to charge, rendering the character vulnerable and immobile. Letting go at any point of time will unleash a vertical slash; multiplying the damage based on charged duration with a maximum charge cap indicated visually by the change of stance. The slash attack cannot be interrupted and player takes 50% reduced damage when performed. For the normal type ability, charged slash inflicts 4 times the amount of elemental damage if the weapon carries an element. |
● Special Ability Heat - Charged Slash (3-Hit Combo)
The heat type ability behaves similarly the normal ability except players are able to combo a 2nd and even a 3rd hit by timing successive taps after landing the 1st and 2nd hit successfully. The 2 extra hits are subjected to damage multipliers from the charge duration but can be interrupted by enemy attacks. This charged slash combo variant loses the 4 times elemental damage boost.
● Playing Style
The core role for the two-handed sword is to land many well-planned hits on the enemy, unleashing tons of damage. This may not be an easy task given the sluggish attacking speed. An ambitious player may be in dangerous scenarios if attacks are badly timed and managed. The key towards mastering this weapon is to grasp good timing, constantly observing for best but safe attack opportunities. Successful attempts to land charged and successive blows, especially when the enemy reveal its weak points would make this a truly formidable weapon.
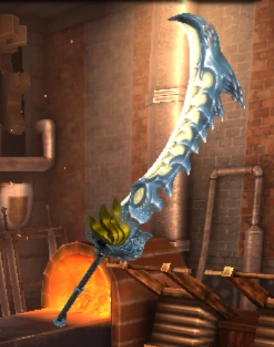
Spear
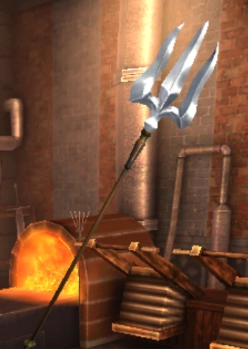 |
● Description
The melee weapon characterized with the longest reach. This weapon type deals moderate damage but has great versatility given its reach and special abilities. With great reach, it also serves as prime choice for farming in normal mission maps, dealing a wide circular swing at the end of each combo. |
● Special Ability Normal - Lunge
Simple to use, lunging is a normal-type spear’s bread and butter. Holding down on the screen allows the player to lunge the spear forward a moderate distance of the current facing direction, dealing damage upon reaching the nearest enemy. Using the ability in succession can close in to a farout enemy within a short amount of time, initiating a combat opportunity swiftly, followed-up by the spear’s powerful combo attacks.
● Special Ability Heat - Jump Thrust
Replacing the lunge ability, the heat-type spear is able to charge up a heat meter by dealing attacks. The meter consist of a maximum of 3 bars. At any time, players are able to hold down which triggers a moveable aiming reticle where the player can move it around the screen up to a limited large radius around the character’s current position. Upon releasing the finger, the player would ascend into the air and disappear. After a short delay, the player would land on the reticle position that deals area damage in a radius, depleting the heat meter. The more heat the player has charged before the attack, the stronger the attack. An immense amount of damage can be dealt in a larger radius if the ability uses a full 3 bars. While aiming the jump thrust, the player would still be vulnerable to all enemy attacks which may interrupt the skill execution.
● Playing Style
The spear is a well-balanced weapon that allows the player to triumph in a variety of situations. Special abilities focuses on closing in distance fast towards the enemy from safe ranges, usually necessary from bosses using attacks within a large effective radius. Certain enemy bosses are especially capable of fleeting movement behaviours, the lengthy attacking reach of the spear can often land an extra 1-2 hits as part of its strategic usage. This passive trait of the spear also presents itself as a weapon of stable damage output with its 4-hit combo succession of decent damage per hit and great reach.
Dual Blades
● Description
The most mobile melee weapon type available to players. When equipped, the base movement speed of the player is the fastest amongst the other weapons. It is also the fastest when attacking, having really short animation delays between successive hits. This is however compromised by its melee attacks being dealt within a smaller range.
● Special Ability Normal - Ranbu
Holding down a tap allows a player to charge up momentarily and after a short delay, the player jumps upward to unlock a flurry of continuous attacks. From the period the player jumps to ending the aerial combo, the player is invincible from all enemy attacks. There is a risk and reward factor where if the player misses the ability, the player would waste precious time on the attack which cannot be cancelled. Upon landing after the ability, there is a minor delay that renders the player stationary and vulnerable to attacks.
● Special Ability Heat - Demonize
Separate from the Ranbu ability, Demonize serves as an active buff for players which can be used after charging up the heat meter from damaging enemies. There are up to 4 bars on the heat meter. Players can activate anytime by holding down on the screen after at least 1 bar is charged. The buff grants the player increased movement speed, attack speed and damage. The heat meter begins depleting upon activation where having a full 4 bars would allow the player to have the longest buff duration.
● Playing Style
The dual blades allow the player to move really fast from one point to another. This is not merely useful in reaching an enemy fast but is also useful for avoiding enemy attacks with precise motion. Timing avoidance of enemy attacks grants the player fastest opportunities in re-initiating combos in between minor enemy attacks. Both special abilities allow for even greater opportunities for players to avoid attacks. The mastery of this weapon lies not in its combat prowess but knowing each enemy behaviour well enough to confidently manoeuvre near the enemy without getting staggered, raining many hits upon the enemy.
Bow
● Description
The exclusive weapon in the game that offers ranged offense. Fighting at long distances maximises the survivability of the player as they are safe from most enemy attacking ranges. This capability is offset with a slower movement speed. The bow also features a risk and reward for confident users, firing from nearer distances would allow the user to deal greater damages.
● Special Ability Normal - Snipe
Simple but requiring good accuracy, players are able to hold down which triggers a moveable aiming reticle where the player can move it around the screen up to a limited large radius around the character’s current position. When the reticle is hovering over an enemy, a target reticle will appear. Upon releasing the finger, the enemy will usually be killed instantly or take massive damage. Enemies behind the first target shot will be pierced through, damaging them at the same time.
● Special Ability Heat - Dark Arrow
The heat-type special ability of the bow behaves similarly to the normal type with an addition of a heat meter below an enemy’s health bar. When the player hovers over the enemy, new areas on the monster will appear for the player to attack in the form of target reticles. Holding down on the screen long enough, the reticle will change in colour and the bow will have a flaming animation. Upon releasing and hitting the target, the monster is struck with a massive dark arrow gaining a charge on the bar. After hitting 4 to 5 times in continual succession depending on the enemy, it will be stunned immobile for a few seconds.
● Playing Style
With its ability to engage out of harm’s way, the bow is able to deal constant damage as they need not reposition or dodge attacks as often as the other weapons. Both special abilities allow for even greater opportunities for players to deal damage and support. With dark arrow, players are able to immobilize and interrupt the enemy attacks granting extra opportunities for allies to deal damage. On the other hand, snipe allows player to hit weak points of the monster accurately. Being in good safety, there are also opportunities for the bow user to revive fallen teammates. However due to its damage depending on range, players are recommended to play within a medium range of the monster for best effectiveness. While the bow takes time to master, players managing their shots and positionings respectively will provide great disabling support for their party.
Equipment Upgrade
As players progress further into the game, enhancing equipment is essential to improve a player’s combat prowess in order to face enemies at higher levels. Players can access this feature by going to the ARMORY and selecting the desired equipment to enhance. Depending on the equipment and target enhancement level, specific materials will be required. These materials can be gathered as drops from particular enemies or enemy bosses. Enhanced equipment increases its attributes, including elemental damage or defense if applicable.
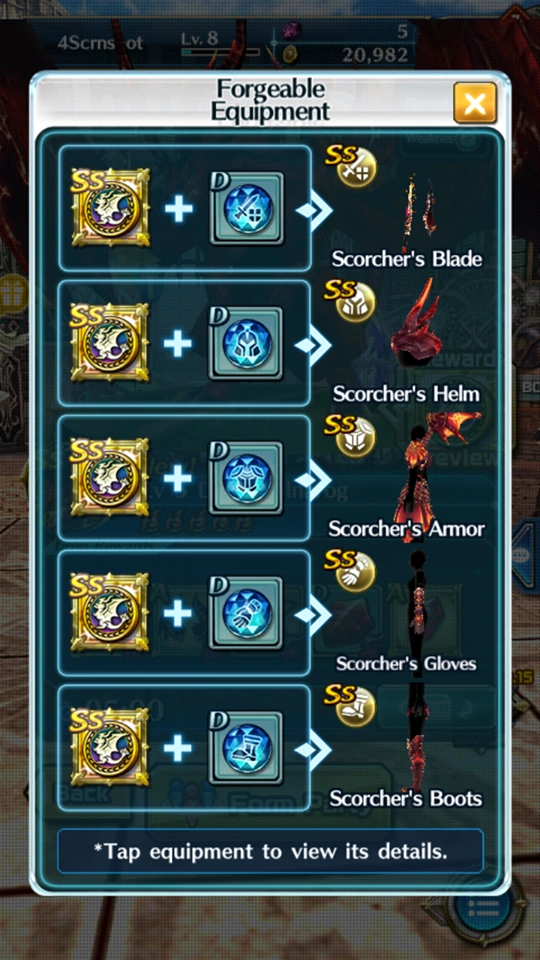
Evolution
Upon reaching the maximum upgrade level, the player will be offered the option to evolve the equipment with equipment crystals. These equipment crystals can be obtained through quests or harvesting materials from the maps. After evolving, the equipment will change names and revert to level 1, starting at the higher stats gained from the first set of enhancements. Depending on the equipment grade, each is allowed a maximum of 2 reinforcements*. To see if equipment can evolve, a player must view it in the COLLECTION or in their inventory and look for an EVOLVE icon above the item name .
*A-grade and below equipment may not offer the option for reinforcement.
Limit Breaking
Every equipment piece in the game is capable of the limit break feature at any level. This costs Lapis belonging to the same grade of the target equipment. Lapis are graded materials that can be retrieved from breaking down crafted equipment forged from boss materials gained through Gacha. Each equipment is capable of limit breaking up to 4 times, each increasing its base attributes with the exception of the 4th time unlocking a 3rd Magi skill stone slot for players to socket.
Magi Stone Slots
All equipment comes with Magi skill stone slots for players to equip powerful enhancers such as having an ability to deal elemental damage or boosting defensive capabilities. Depending on the equipment, each one will provide 1 to 2 slots of different types of Magi skill stones. Players are able to unlock an extra one through attaining the 4th time of limit break.
Passive Abilities
All types of equipment will come with 2 randomized passive abilities depending on its type. Certain special weapons may have an additional 3rd predefined passive ability indicated by green. There are a wide variety of passive abilities that generally boosts offensive or defensive capabilities. The set of 2 randomized abilities can be replaced any amount of times, costing gold coins. The predefined green passive ability will also gain bonuses from equipment reinforcement.
Magi Skill Stones
Overview
Magi Skill Stones serves as equipment enhancers and are obtained mainly from the Magi Gacha. Similar to Enemy Boss Gacha, C-grades are the most common and weakest while SS-grades are the most rare with powerful abilities. Depending on the equipment, players will be able to equip up to 2 different categories of Magi Skill Stones. A Magi Skill Stone with an active skill requiring casting comes with its cooldown, area of effect and casting duration. There are a wide variety of skill stones, separated into 4 categories as listed below:
Attack Magi Stones - Active Skill
Star shaped and only socketed on weapons, this magic stone allows players to deal massive elemental damage to enemies when casted. The stones often come in 2 distinct types: Ranged and Melee, depicted by their different icons respectively and represents the damaging reach of the ability.
Recovery Magi Stones - Active Skill
Heart shaped and only socketed on weapons, this magic stone allows players to recover health lost in combat. The stones are further sorted into 3 types, Regeneration, Instant recovery and Party heal. While recovery is the main focus, certain Recovery Magi Stones may have added supportive benefits such as removing status ailments or paralyzing nearby enemies.
Support Magi Stones - Active Skill
Diamond shaped and only socketed on weapons, this magic stone allows players to give additional attribute bonuses to their character when activated. The stones are further sorted into 3 types, Defense, Damage Increment and Laying Traps. Certain stones may come with added benefits such as movement speed buff or enabling poison-type damage for limited time.
Stats Buff Magi Stones - Passive Enhancer
Circular shaped and only equipped on armor pieces, this magic stone provides the players with additional attribute bonuses passively, increasing survivability and damage. The stones are further sorted into 3 types, Armor, Health and Damage. Occasionally, there may be stones that allow benefits such as increased movement speed instead.
Strengthening Stones
Similar to equipment, Magi Stones can be upgraded using Strengthening Stones, these stones are obtained from exploration maps (e.g. harvesting/ mining) and quests (e.g. daily quests). The higher grade the strengthening stone, the more upgrading experience will be granted. Strengthening Magi Stones will improve its ability and/or passive attributes (e.g. An attack stone will increase damage output, a recovery stone will improve amount of health recovered).
Quests
Overview
In the game, quests are used to earn experience points, gems, and coins. Players are asked to hunt behemoths, kill monsters, collect materials, and upgrade equipment or magi. They are the main source of advancement in the game and guide the players' actions. There are three types of quests: Story, Recurrent, and Event.
Story Quests
The story quests provide the main plot and provide players with crystals and materials, used to summon monsters and upgrade equipment, respectively. They are divided further into Main, Side, and Secret quests.
- Main Quests
In main quests, players are asked to explore new areas, kill monsters, and hunt behemoths. The behemoths are located between areas of the map, encountered after unlocking and entering the portals between them. After completing a quest, the player must return to the homepage and watch a storyline cutscene to receive the reward. The main quests are identified with green banners, a Pamela icon, and a red banner titled "STORY" beneath Pamela.
- Side Quests
Players complete side quests by collecting materials dropped by monsters, and they are located in previously discovered areas of the map. Unlike main quests, side quests can be completed in the field. If a main quest and side quest call for the same material, collecting that material will count for both quests at the same time. Side quests have a blue banner and a random NPC icon.
In some side quests, the material to be collected in written in orange text, indicating a rare material. The drop rates for these items are lower than normal, so it may take players longer to complete the quest. The rewards for these quests are usually better than other side quests.
- Secret Quests
Secret quests are unlocked after the main quests are completed. They occur in three new areas, adding 'Hidden' to the beginning of a previously discovered area type and including one of three types: Dark, Darkness, or Black. Monsters and Behemoths in Hidden areas are higher level than monsters in the main areas. Secret quests are continuations of the main storyline of the area and must be redeemed in the homepage after a cutscene. They have a purple banner, a Pamela icon, and "SECRET" title under the icon.
Recurrent Quests
Recurrent quests reward players with Pikke coins, gold, summon tickets, and various potions. Because they reset regularly, recurrent quests are an excellent source of summon tickets to diligent players.
- Daily quests
Daily quests include three true quests and a fourth bonus quest. In the three main quests, players will be asked to collect materials, purchase something from Pikke's shop, upgrade equipment or magi, and defeat behemoths, sometimes with a particular weapon or within a certain time. The fourth quest is completed after finishing all three daily tasks. The main quests give 100 Pikke coins, and either a potion, Magi fragment, or gold. The bonus quest rewards 5 gems and 300 Pikke coins. These quests reset daily, based on server time.
- Weekly quests
There are five weekly quests, four main quests and one bonus. The main quests are lengthier than daily quests but give better rewards. Each gives 200 Pikke coins and two summon tickets after completion. The bonus quest is completed if the player finishes all seven daily missions and rewards 400 Pikke coins and 25 gems. Weekly quests reset 12 AM Monday, server time.
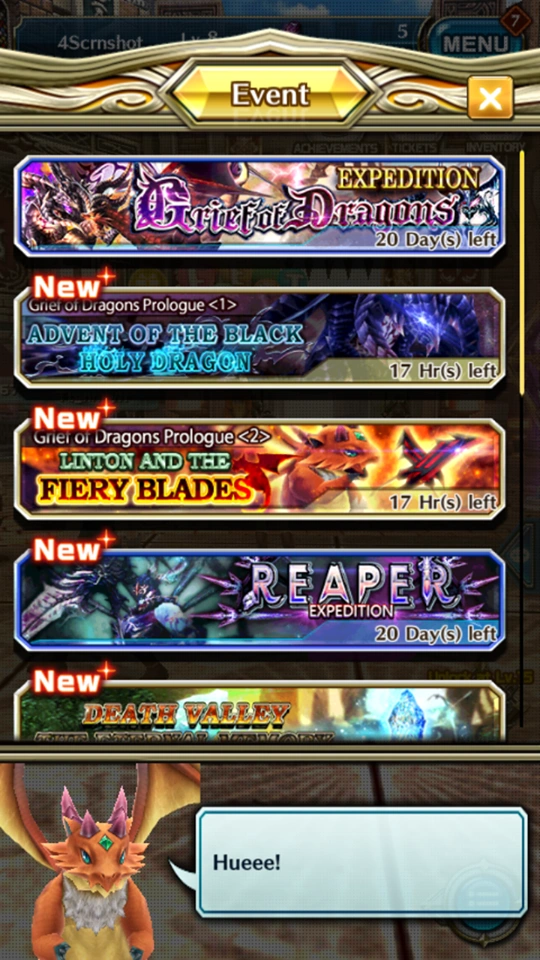
Event Quests
The event quests in the game provide the players with additional content and additional sources of materials, gems, or summon tickets. These quests are further broken into three types, Material Collection, Dungeon Clearing, and Tower Clearing.
- Material Collection quests are opportunities for players to collect monster-exclusive materials through the completion of quests. Each weekday features two behemoth types, and each includes four quests ranked Novice, Intermediate, Advanced, and Master. The player is taken to an area filled with only one type of monster, related to the behemoth, and they must slay monsters to unlock the portal to the quest behemoth and the next area. Killing the behemoth completes the quest, and each quest rewards increasingly rare materials. The final behemoth is a random encounter in the third and final area. The player must return to the homepage to redeem rewards. On weekends, one behemoth quest from each weekday is available in addition to a Gold Jelly mission, which rewards gold.
- Dungeon Clearing quests provide players with additional storylines, similar to the Story quests. Each dungeon clearing event includes a new map to unlock and explore, main quests, and side quests. Completing quests grants players summon tickets, gems, equipment, and materials. Event equipment enhancement and/or evolution require materials found only through completing other quests in the same event, or series of events. Rewards for each quest may only be collected once. Event quests have an orange banner, the icon of the main NPC quest-giver, and an "EVENT" title under the NPC icon. Side quests have brown banners and random NPC icons.
- During Tower Clearing events, players are asked to clear a behemoth-filled tower, five floors at a time. Each five-floor quest has a time limit of five minutes and a maximum of four participants. New players cannot join once the others have entered the tower, and each player is limited to four assist revives and no gem revives. If a player runs out of revives, they enter spectator mode for the rest of the floor and will be auto-revived at the next floor. Time bonuses are granted for defeating the behemoth and breaking parts. The behemoths increase in level as the players move up the tower, and rewards for each floor can only be claimed once, though points can still be earned by repeating quests.
Consumables
Overview Consumables in the game are categorized into 3 types Gems, Tickets and Potions each with their own uses. All 3 can be obtained through quests and often given as login reward as well.
● Gems Known as the premium currency in the game, these Gems are purchasable by cash. It has 3 primary functions: for Gacha (Monster & Magi Stone), reviving yourself during combat and purchasing premium potions with enhanced effects.
● Gold Used as the main currency of the game, this can be earned through gameplay via many sources and is used for most of the game’s expenses including upgrading equipment and magi stones.
● Medals Used to exchange for crafting materials, potions, gacha tickets and currency. These medals can only be gained by successfully killing bosses.
● Gacha Tickets Only obtainable through quests, these tickets are only used to gacha for bosses. 5 tickets are required for a single boss summon while gathering 50 tickets enable players to do a more attractive 10+1 bosses summon. Individual tickets usually have an expiry date, be sure to use them before they expire.
● Potions Potions are consumed to temporarily enhance gameplay by providing the following possible benefits:
- Increased gold earned
- Increased experience points
- Increased amount of drops
Potions usually come with a single benefit and last 30 minutes, unless they are premium ones purchasable with gems. Premium potions grant all the above benefits and last 60 minutes.